

How To Create A Human
Metahuman Creator: How to build a realistic CG human
When Epic introduced Metahuman Creator, it knew that creating humans has long been the holy grail for CG artists. It's a task that has always been seen as difficult and time-consuming, partly because the end result isn't just about the geometry, or the materials and lighting, or the rigging and posing. It is all those things, but a believable human is definitely far more than just the sum of its CG parts.
In this how-to guide, we'll run you through getting started with some of the key tools MetaHuman Creator offers, so you can get up and running as fast as possible, and you'll have your own 3D characters rendering in no time.
Want to give your realistic CG humans the artistic edge? Check out our list of the best 3D modelling software.
MetaHuman Creator is an online tool for generating photorealistic human characters for use not just in its own Unreal Engine, but in other 3D apps too (currently only Maya is supported, but expect others later). The tools are simple to use, with a similar feature set to other character creation software, but the results are a step ahead of anything else you might have tried.
MetaHuman Creator's blending tools let you take pre-existing characters and morph between them. This isn't restricted in any way so creating characters based on different statures, ethnicities and genders is both fun and rewarding. If you don't use Maya and want to access your characters in your chosen host app, you can export them to Unreal and then take them from there to your software as an FBX. It's a workaround for now, but we're sure Epic will release new bridges soon.
01. Take it to the bridge

(Image: © Rob Redman)
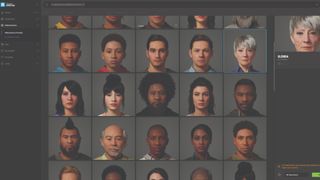
Although you can access the MetaHuman Creatordirectly from a browser, you can also use Quixel Bridge, which we would suggest, as it is also where you will download and export your finished character. On the browser panel, click the avatar icon, choose from presets or saved metahumans, then on the right click Launch MHC. One thing to note – if you want to export a finished character to Unreal Engine from here, then you'll need a level open in Unreal, otherwise you'll get an error message.
02. Get in control
(Image: © Rob Redman)
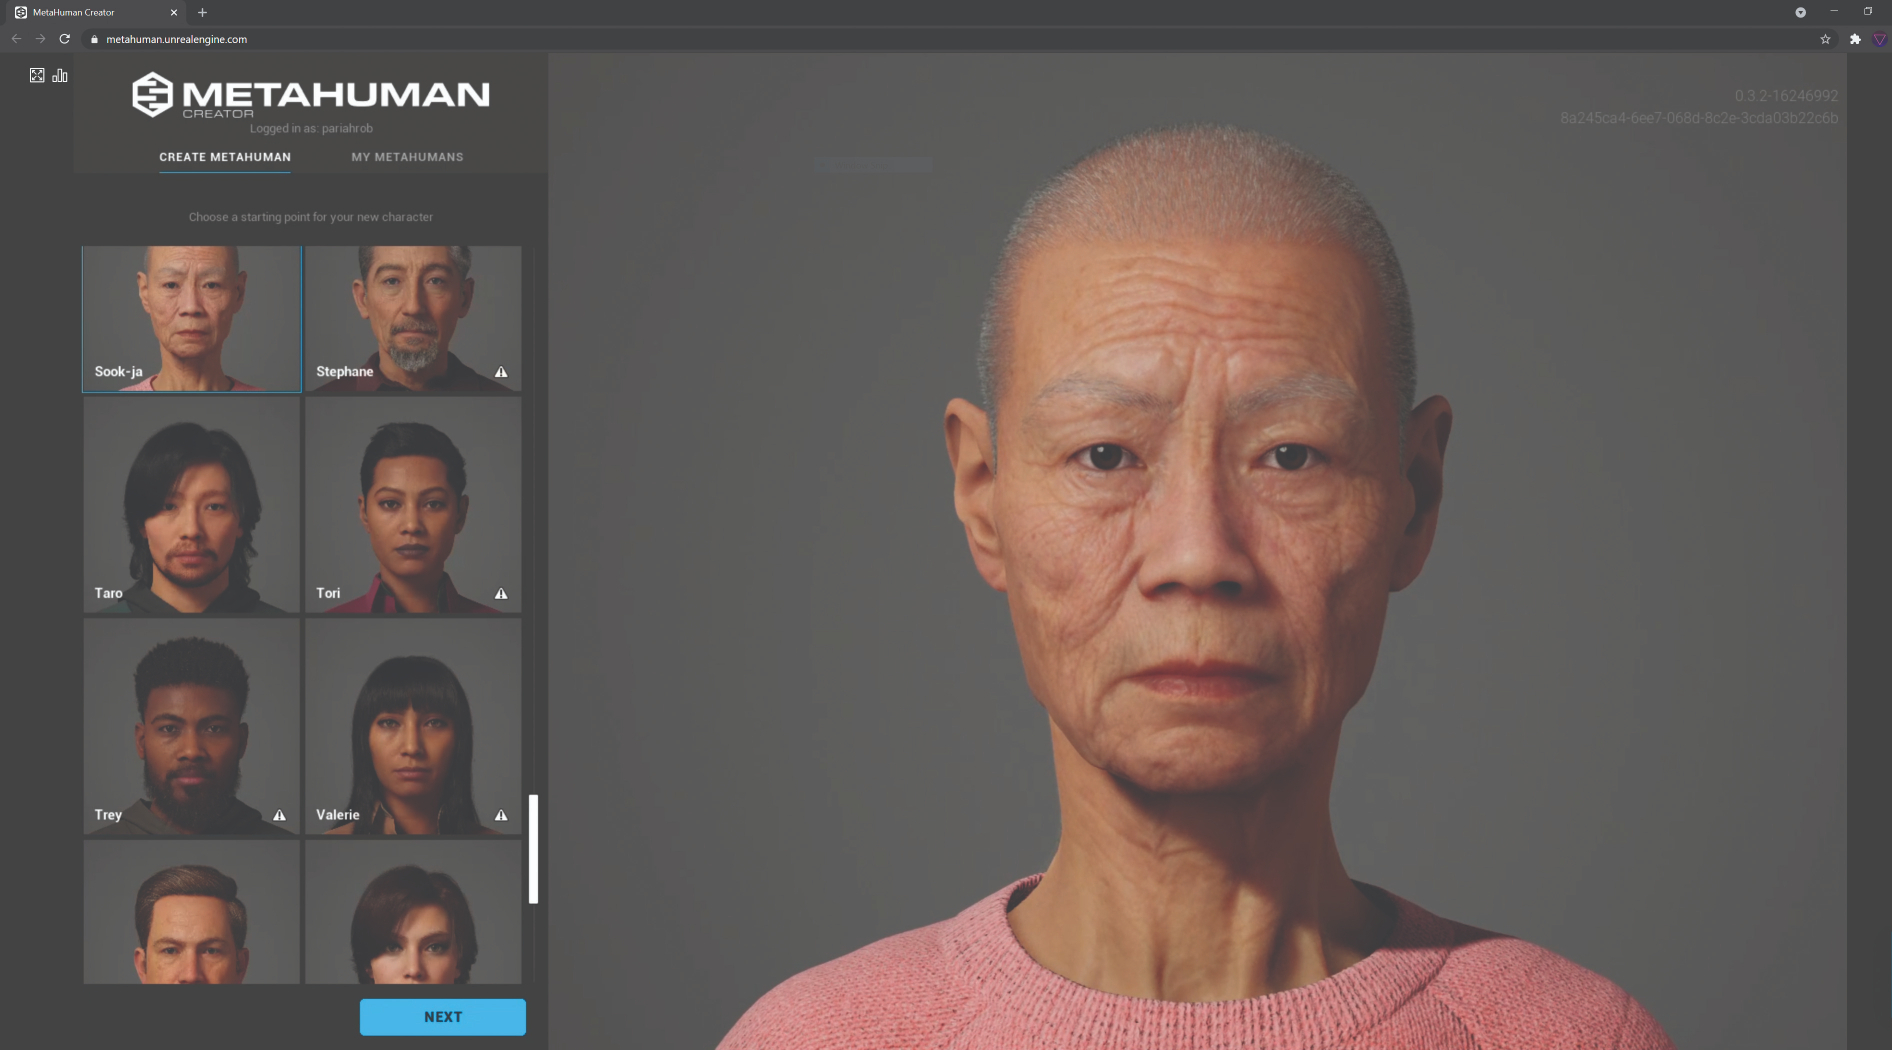
Once in, you'll again be faced with the choice of any of your customised characters or presets. Don't worry too much about which you start with, as it really is just a kicking-off point and you can customise as you go. That said, if there is one that looks close to what you want, you may as well start there. You can merge in others in a minute. The library of presets is really good, with a lot of variation on display, but if nothing is quite right you can morph with others later on.
03. Merge face blends
(Image: © Rob Redman)
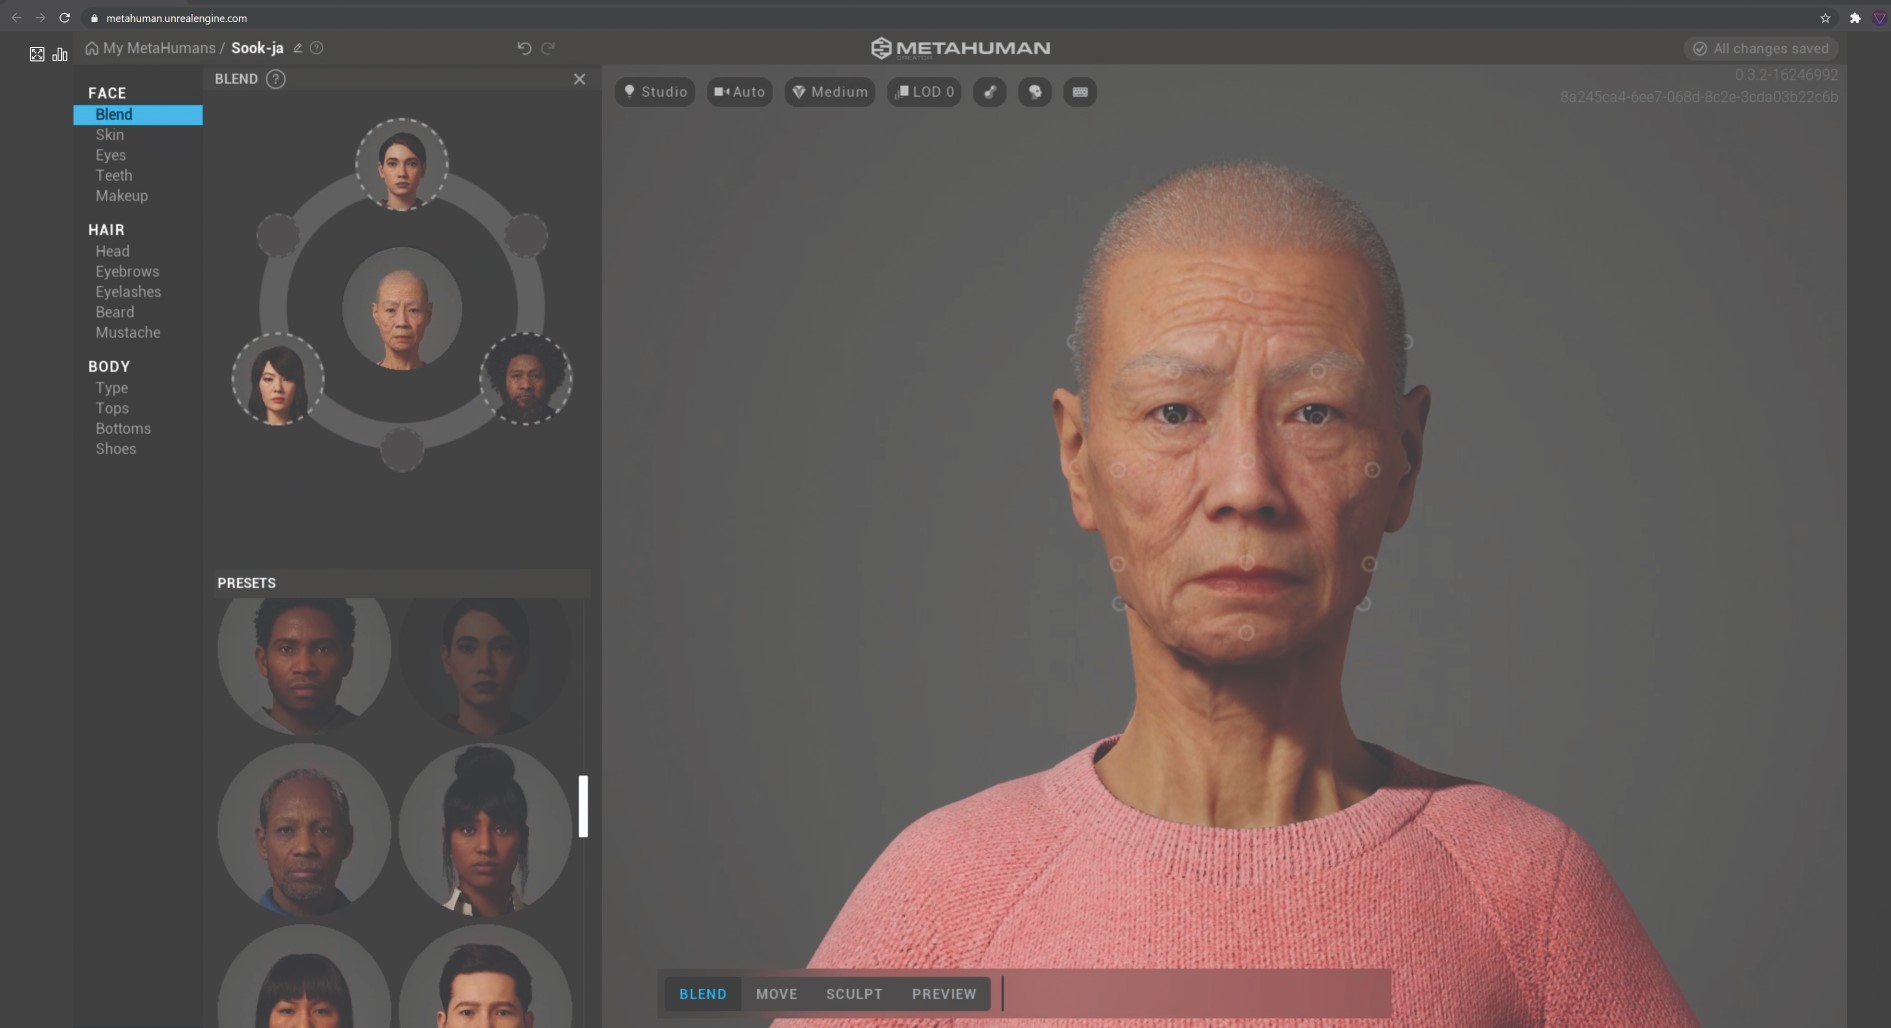
This is where the fun begins and the power of the MetaHuman Creator really shines. Move to the Face tab and you'll be presented with a dial, with three spots around your character. You'll need to stop the preview animation to activate this, but once you have you can click on any of the control points on the main render panel. When you drag these towards any of the three morphs, your character will update in real-time. Do this for as many of the control points as you wish to help define the basic structure of your character.
04. Use texture morphs
(Image: © Rob Redman)
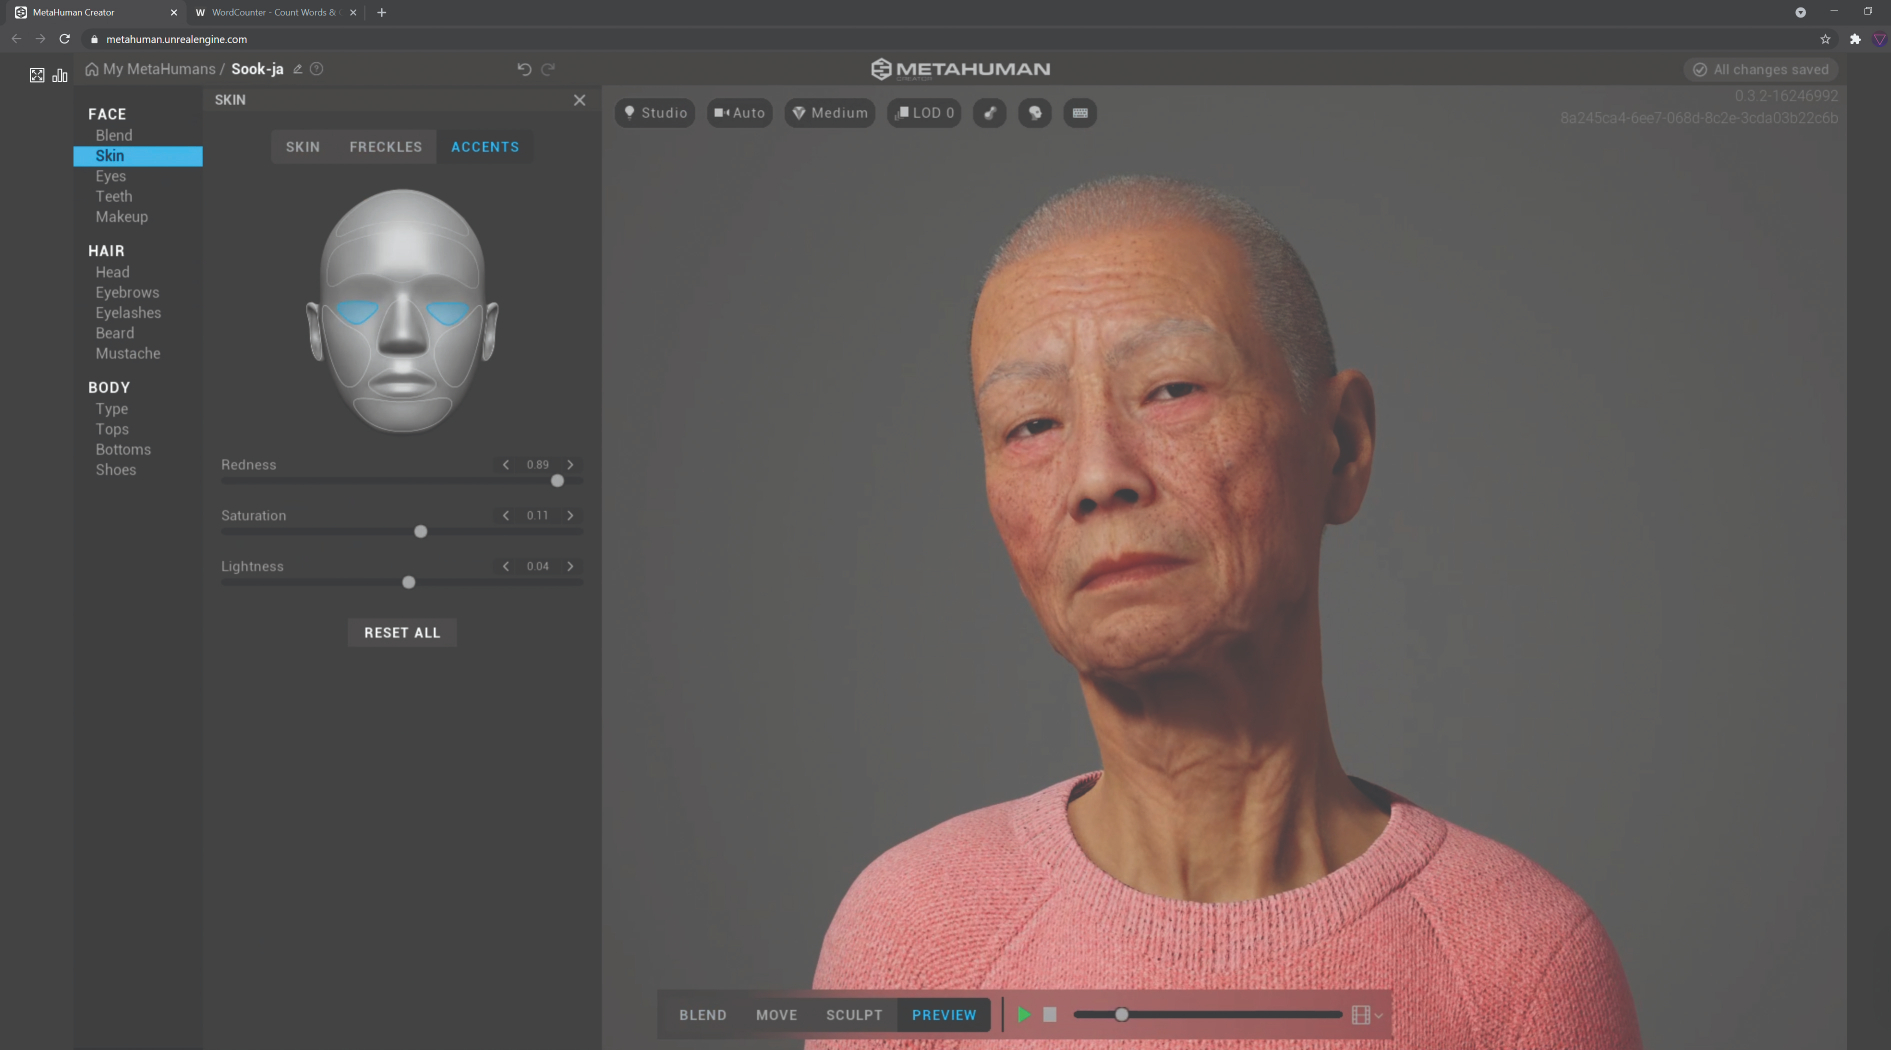
One of the more subtle but useful features lives in the Skin tab. Yes, you can adapt the skin colour and roughness etc, but if you move across to the sub sections here you can add details like freckles or accents. These change the textures applied to local areas of the character, giving you an easy method to apply ruddy cheeks, grey eye bags, or add some colour to the forehead. Aspects like this really make it easy to refine the character in the way you want. We also appreciate that it doesn't let you go too far, keeping things within the realm of believability.
05. Remember that eyes are windows to the soul
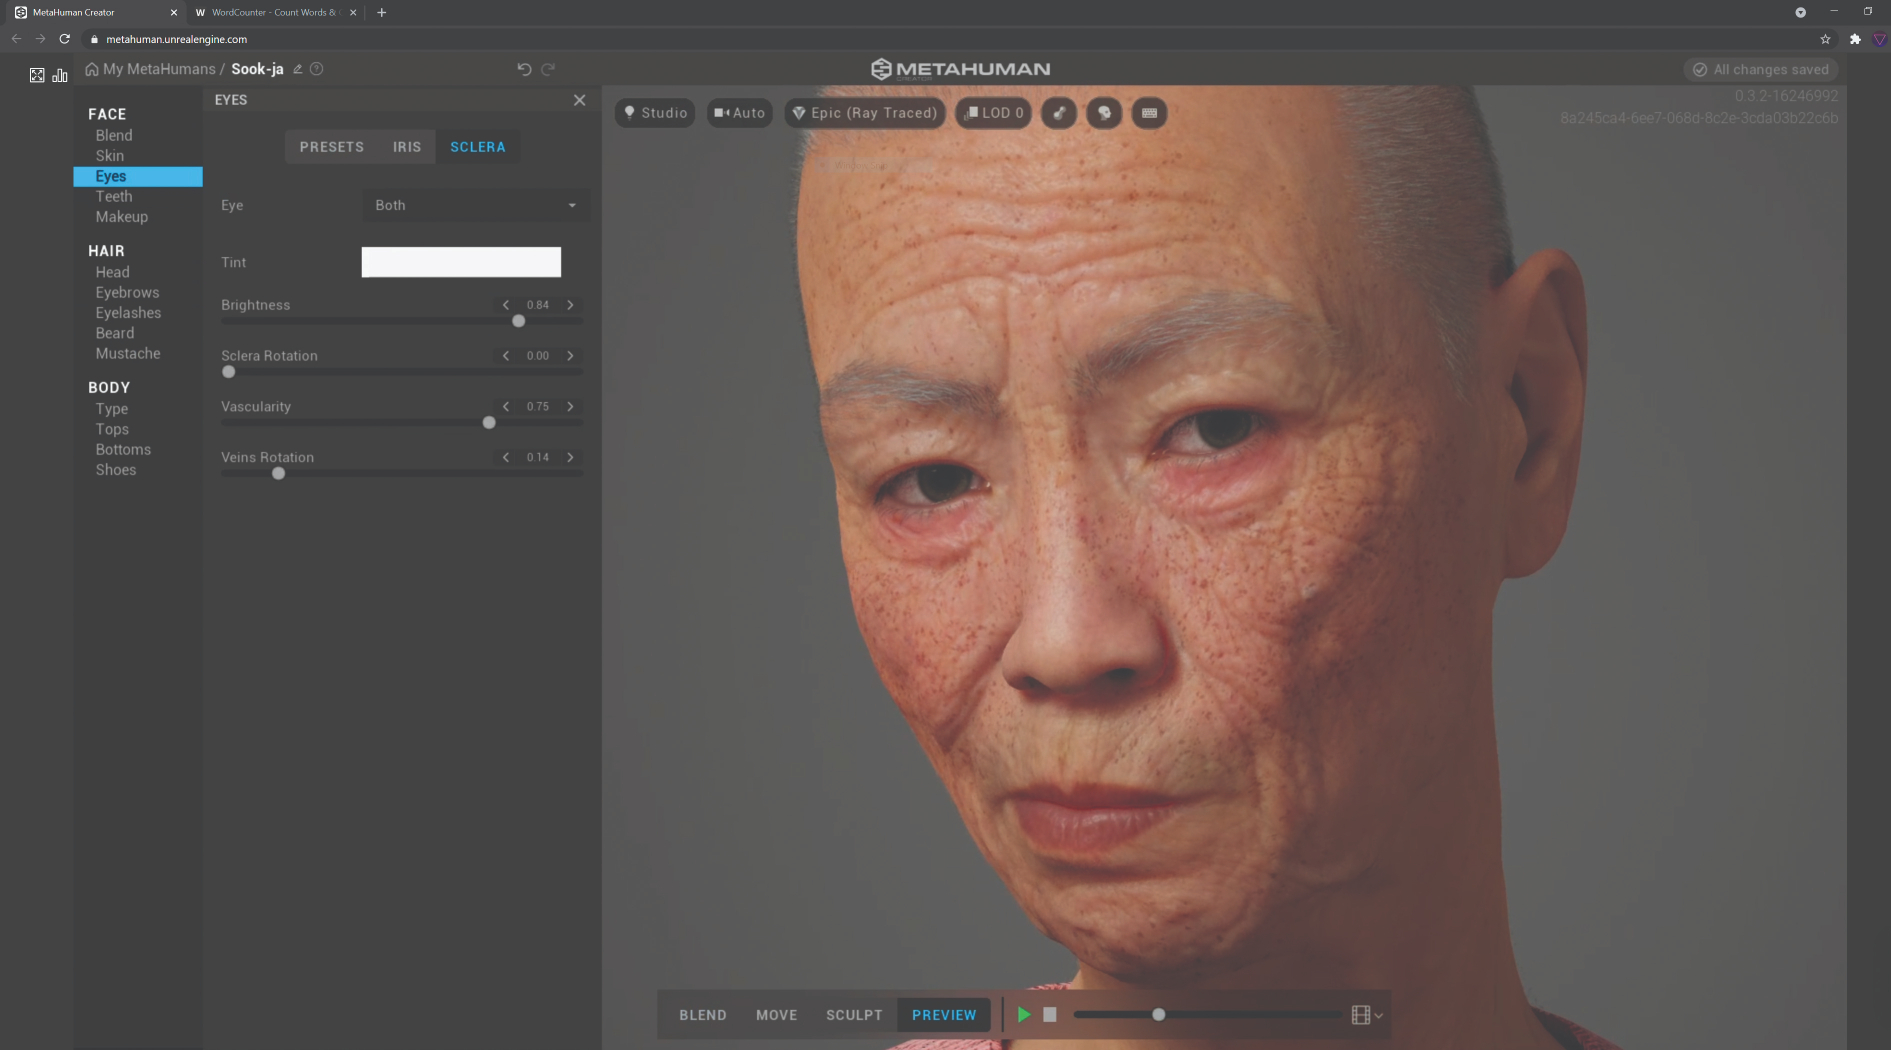
(Image: © Rob Redman)
We won't go through all the face sections, but we will point out that when you get to details like eyes it may be worth closing in on your character's face. You can use your scroll wheel to do this, then use Alt + middle mouse button (MMB) to pan, and Shift + MMB to orbit. On top of this, you might want to increase the render quality. To do this click on the third button at the top of the main view to select a render level. You can also define which lighting scene is used by clicking the Studio option, as well as a few other options for previewing your metahuman.
06. Groom with a view
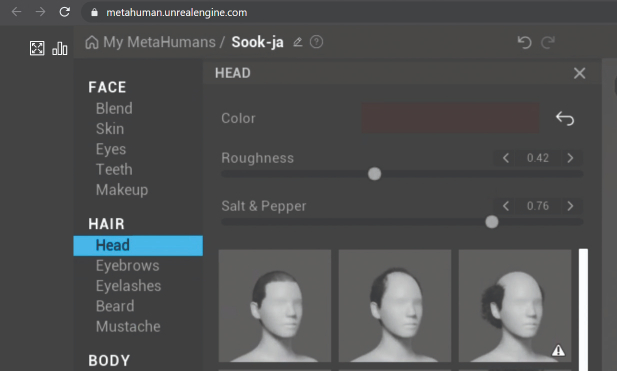
(Image: © Rob Redman)
Addressing the hair works in a very similar way, and there are subsets of the grooming tools with similar controls. You'll also find a number of preset styles. Once you decide on a main style you can click the colour swatch, which opens a pop-up window where you can drag sliders, or click in the Colour panel to choose your settings. Once done you can adjust the glossiness/roughness of the hair and dial in any grey. The styles on offer work really well here but there are currently no styling tools, only material ones.
07. You've got to move it, move it
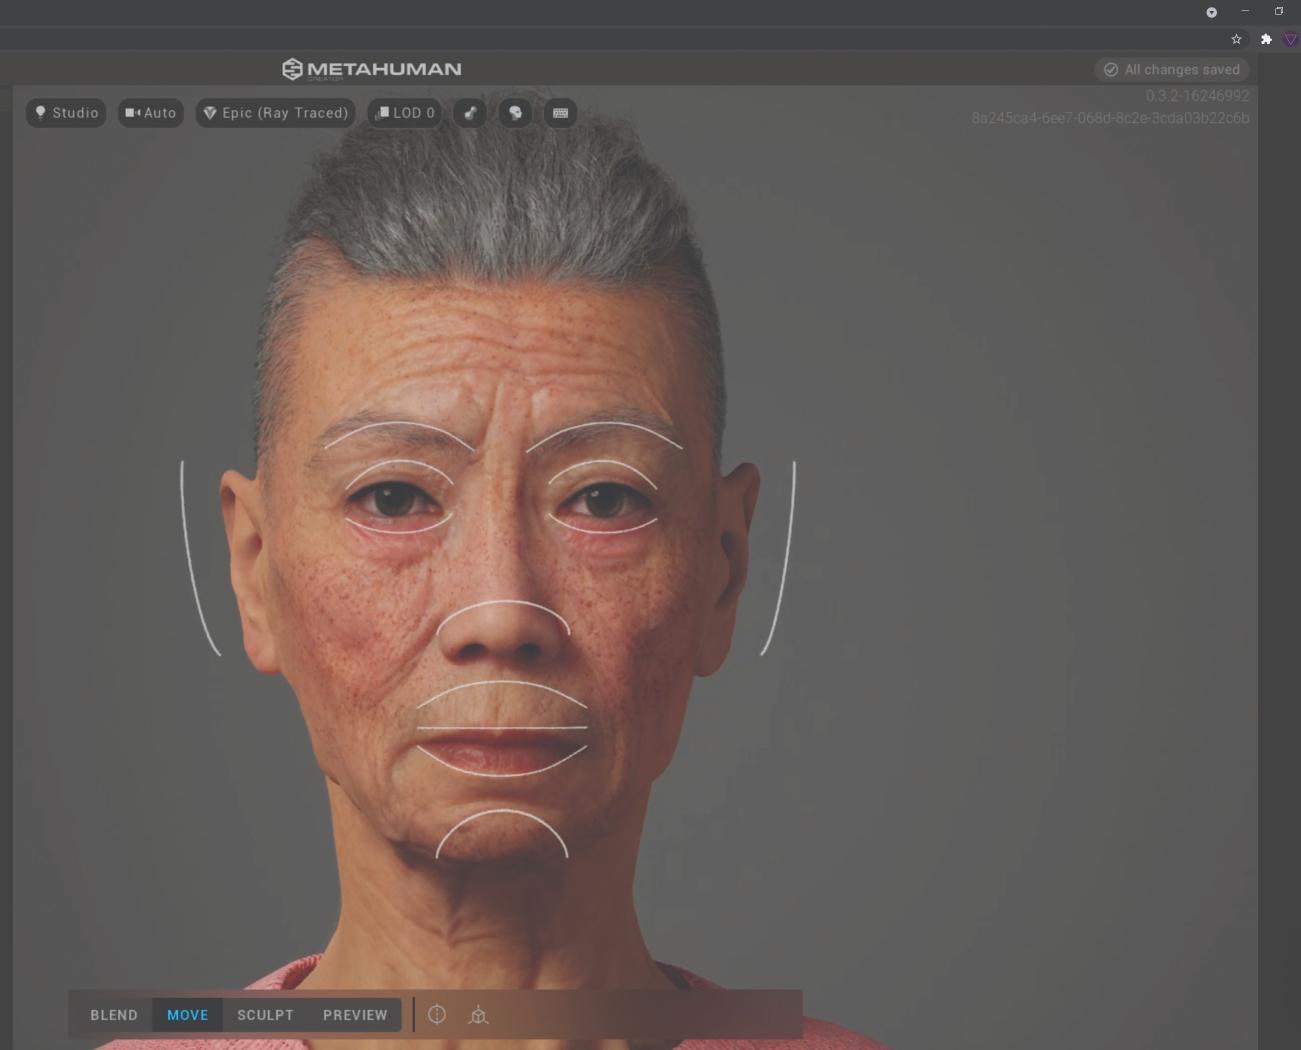
(Image: © Rob Redman)
Near the bottom of the main view is the Move button. Select that and you'll see some control handles appear at key points on the face. Clicking and dragging them moves the associated geometry. Again, this won't go too extreme, which is a good thing, but it does let you refine the look of the character even more. For greater realism, you can deactivate the symmetry and choose the plane of execution. The key here is to keep it subtle and to work on the character's personality. If they are quizzicle, then a single, slightly raised eyebrow could be appropriate for example.
08. Sculpt your muse
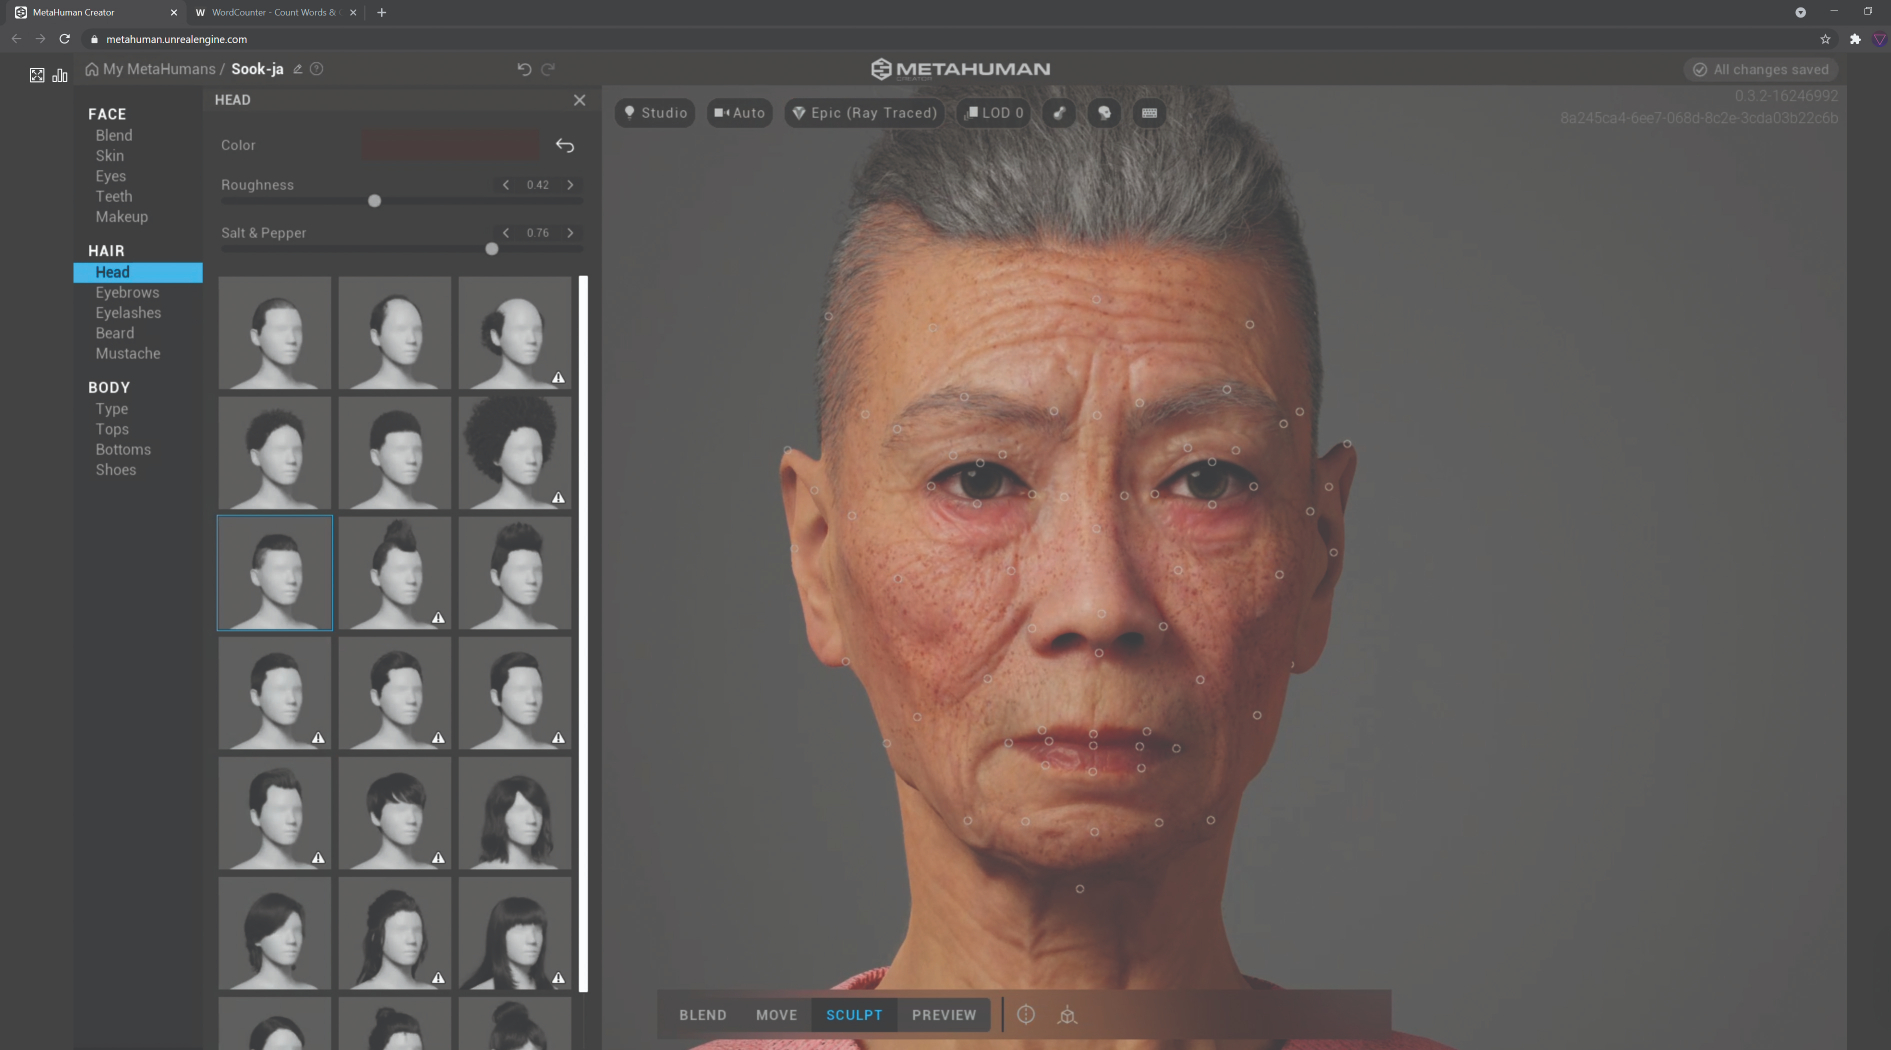
(Image: © Rob Redman)
Next to the Move tool is the Sculpt tool. This one is more refined and allows for more control over smaller features. Activate this (you'll have similar options for symmetry) and you'll see a set of control handles appear. Clicking and dragging these works how you have probably come to expect by now. They may affect smaller areas, but they can have a dramatic effect on the overall appearance of your character. When doing this you might find it useful to orbit round the model as you work, to ensure you are getting the desired results.
09. Create a body of work
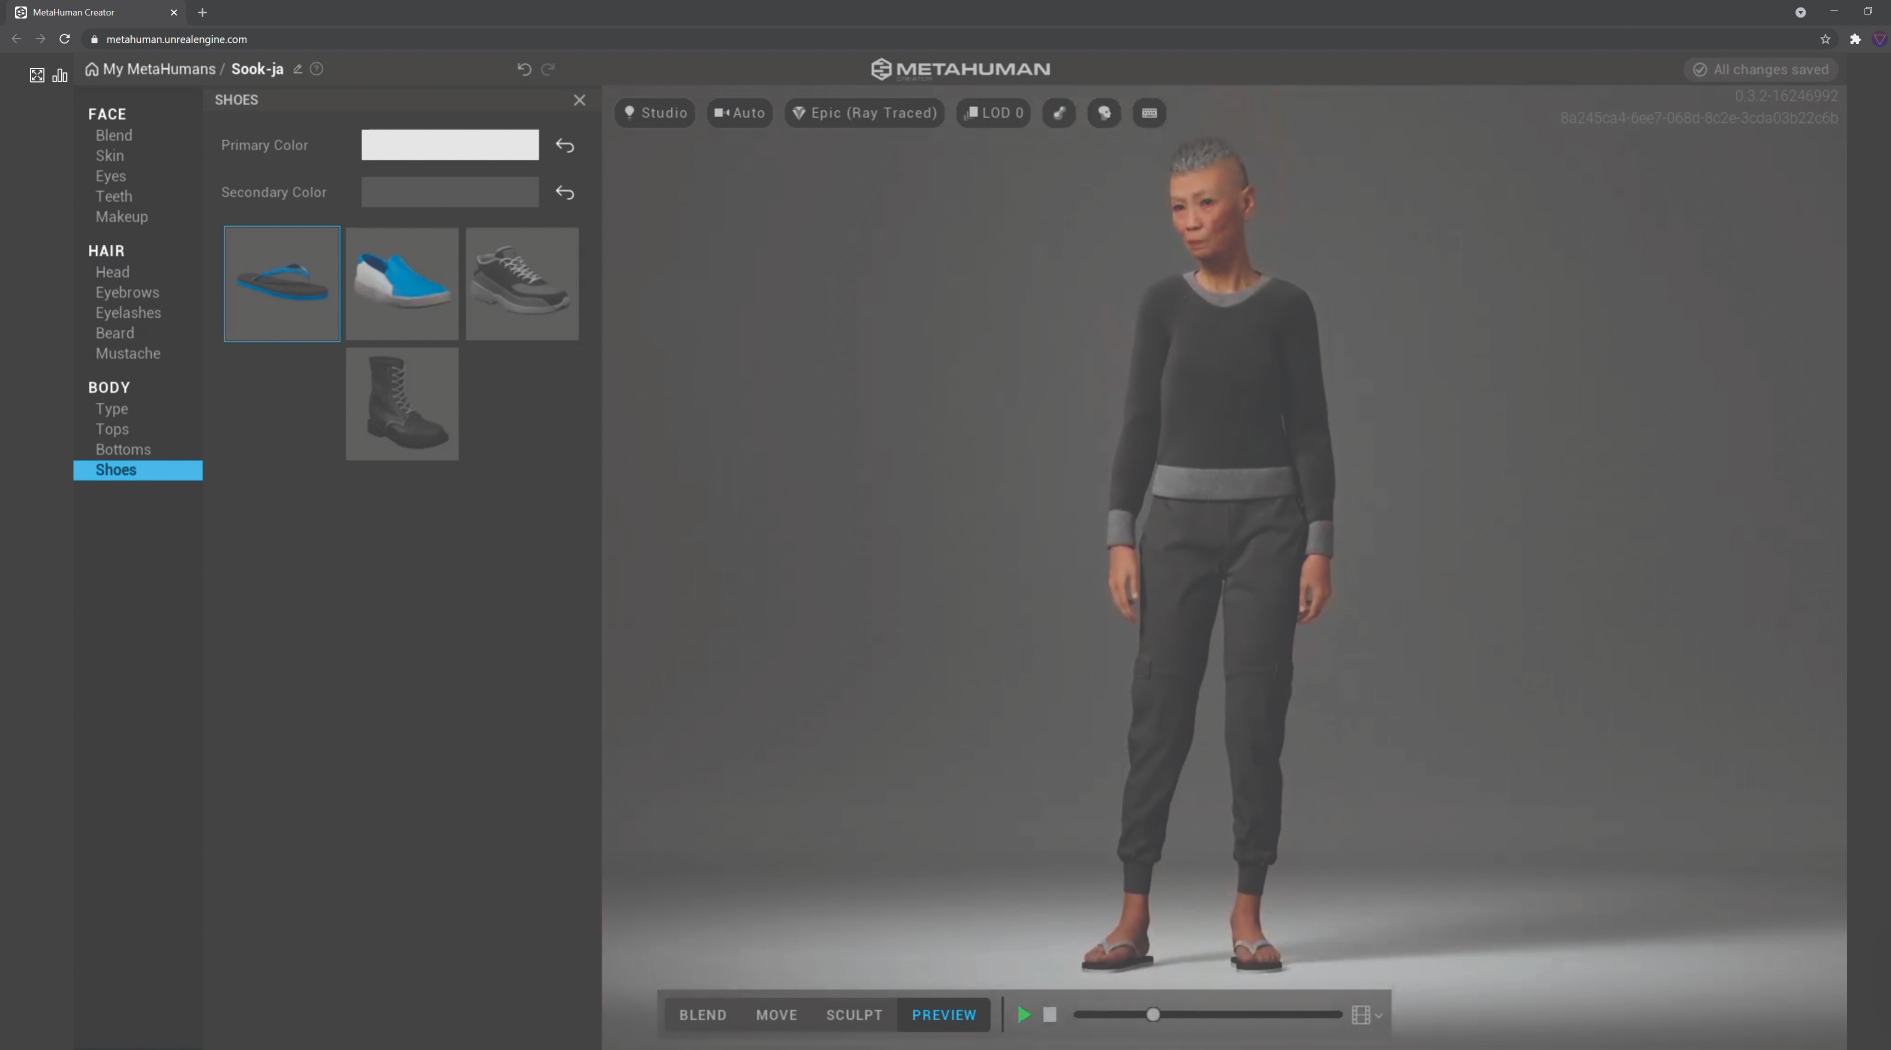
(Image: © Rob Redman)
In the Body section you can choose from a selection of body types, under short, medium and tall. These are your standard mesomorph or ectomorph types. There are only a handful, but they get you where you need to be. The Blend, Move and Sculpt tools don't work with the body, but you have enough options to work with. It's also here that you choose from a palette of clothing, which have controls for primary and secondary colour. You may choose to use a different application to clothe your metahuman, but it's nice to have something to run previews with.
This article was originally published in 3D World , the world's best-selling magazine for CG artists. Subscribe to 3D World .
Read more:
- Free textures: Where to get 3D textures for your artwork
- The best 3D modelling software around
- V-Ray 5.1 review

Rob Redman is the editor of 3D World and has a background in animation, visual effects, and photography. As well as being a multi-instrumentalist, Rob is also an avid beard grower.
Related articles
How To Create A Human
Source: https://www.creativebloq.com/how-to/metahuman-creator
Posted by: hubbardwhationam.blogspot.com
0 Response to "How To Create A Human"
Post a Comment