How To Draw A Hawk
This tutorial shows how to draw and shade a realistic looking hawk's head step by step from the side view.
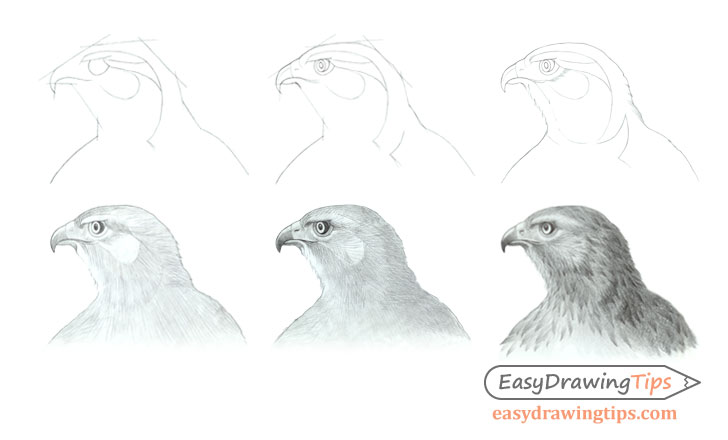
Before starting this tutorial please note that some of the construction lines have been made darker simply so that they are easier to see.
If you are going to be following the tutorial using pencil and paper you should make very light lines for the initial parts of the drawing. Especially the construction lines from the first step which you will want to erase later on.
Step 1 – Sketch the Major Proportions of the Head
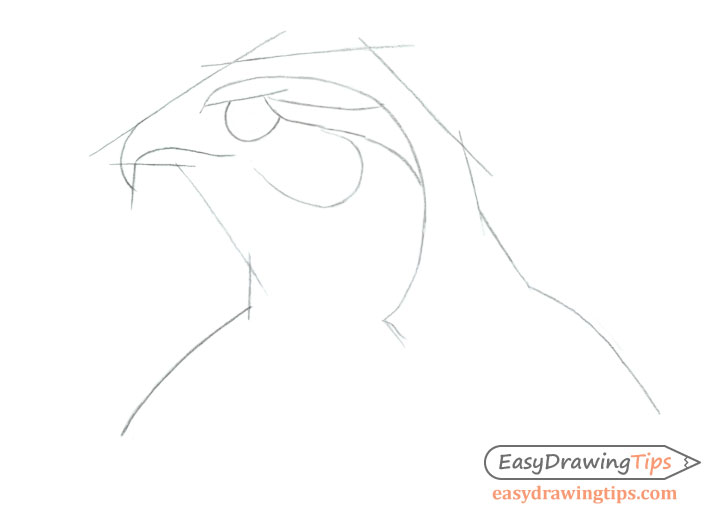
Start the drawing by establishing a the proportions of the hawk's head. Do this by doing a rough overall drawing of the major shapes without any of the smaller details.
The goal is to make sure that everything is in the right place and of the right size.
Start the drawing from the top of the head. In the above example you can see that it is pretty much established with just four lines One going from the curve of the beak to the end of the forehead, one for the top of the head (angled forward toward the beak) and two for the back of the head. Draw these lines as in the example and afterwards add the lines that represent the bottom of the beak followed by the line that establishes the bottom of the head (transitioning into the neck)
Next add the line for the back of the neck and the curves of the shoulder.
Finally add the outer curve of the beak to finish the outer shape.
For the inner shape of the head start by drawing the outer shape of the eye area followed by the inner curve of the beak and the eyebrow area above.
Afterwards add some lines to represent the more obvious feather formations around the head (to help with the shading later on).
Step 2 – Draw the Smaller Details
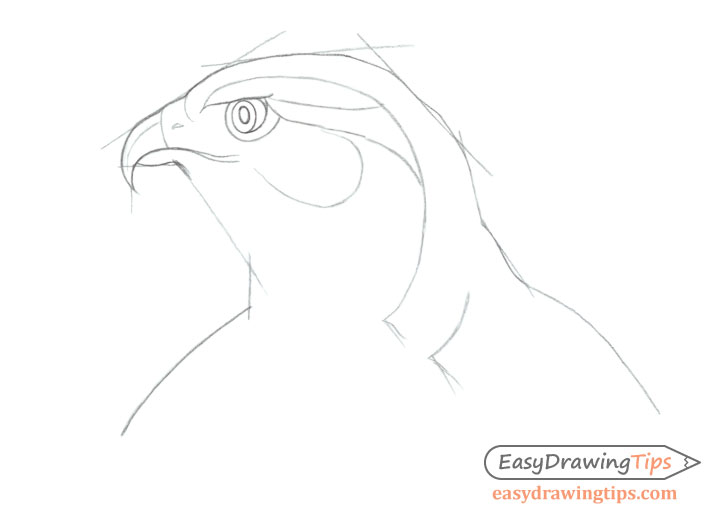
Within the proportions sketch create a smoother line drawing of the hawks head including the smaller inner details of the eye and the beak.
Step 3 – Finalize the Line Drawing
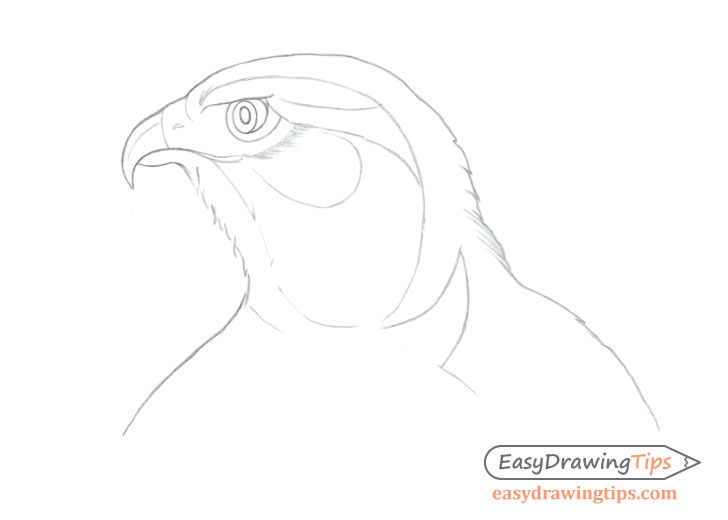
Clean up the shape structure lines and add some of the very small details like hints of the feathers in the areas where the feathers tend to stick out. In this case it's at the bottom part of the head and along the neck as well as the bottom of the back of the head and back of the neck.
Step 4 – Apply Basic Shading
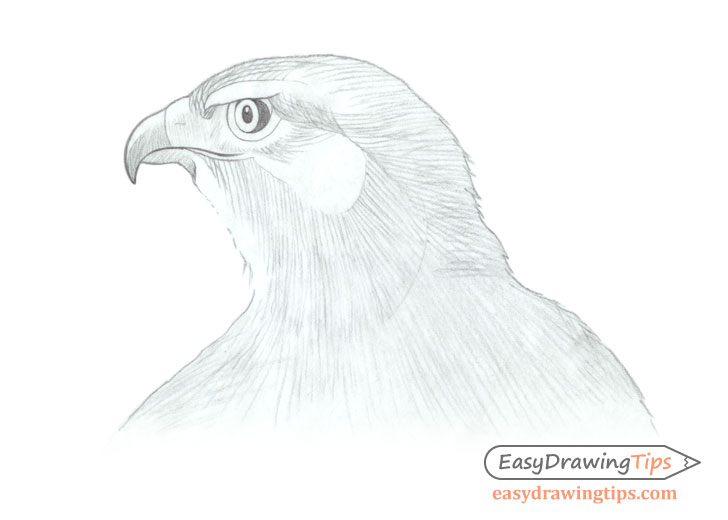
Before applying shading determine your light and dark areas. In this case the light is coming from the upper left area of the drawing which means that the shadows will be towards the back.
The overall darkest areas will be the beak and parts of the eye (simply due to their color). You can shade in the dark areas of the eye with a solid fill without showing any strokes.
For the rest of the head try and apply the strokes in a directions that flow along it's shape (as shown in the above example).
For a detailed explanation of different kinds of shading techniques and examples of shading various objects see:
- Shading Techniques and Stroke Types Drawing Tutorial
- How to Shade Basic 3D Shapes Tutorial
Step 5 – Refine the Shading
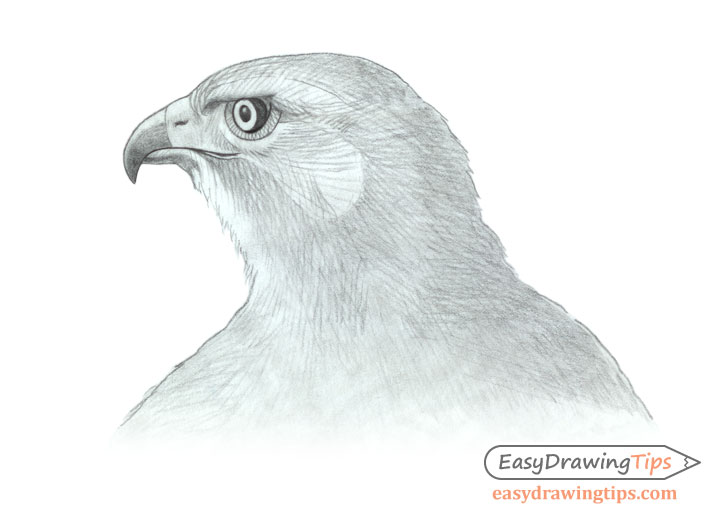
Refine the shading by applying another a set of strokes in a lightly different directions to create a cross hatch.
Apply darker strokes to the "in shadow" areas such as the back of the head.
Step 6 – Finish the Drawing
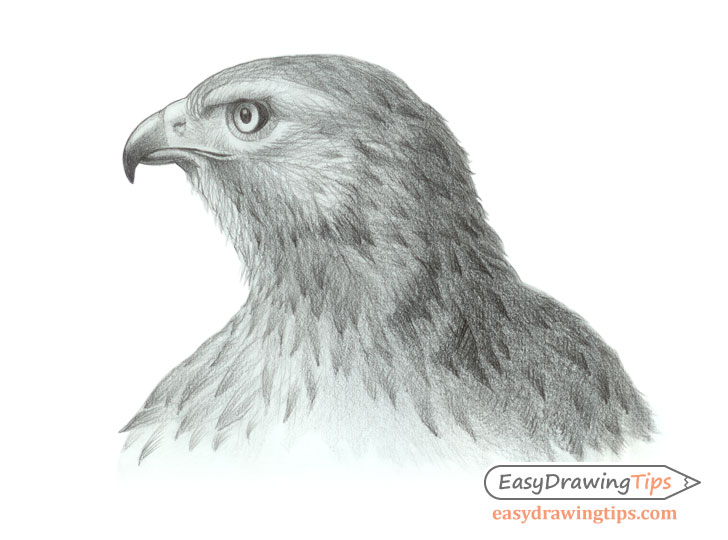
Finally add some hints of the feathers. Generally these will be darker towards the ends and lighter towards the base. Be sure that the feathers are also shaded according to the overall light and shadow on the hawk's head. This means that the feathers in the back and other "in shadow" areas should be shaded darker than the feathers in the areas that are facing more towards the light.
Conclusion
This is a fairly advanced tutorial. If you find the shading to be too difficult you can practice by just doing the line drawing of the hawk's head or only going as far as the basic shading step.
For more similar tutorials also see:
- How to Draw an Eagle Head Step by Step
- How to Draw Bird Step by Step – Side View
- How to Draw a Dog Step by Step
How To Draw A Hawk
Source: https://www.easydrawingtips.com/how-to-draw-a-hawk-head-step-by-step/
Posted by: hubbardwhationam.blogspot.com

0 Response to "How To Draw A Hawk"
Post a Comment